A Developer's Guide to Running a Database on a Mac in 2026
Learn to master your database on a Mac. This guide offers actionable steps for setting up local and cloud databases, and streamlining your entire workflow.

Running a database on a Mac isn't just a workaround; for many of us, it’s the most efficient way to build modern applications. Because macOS is built on a Unix-like foundation, it’s a natural fit for the powerful open-source databases that drive the web, like PostgreSQL, MySQL, and SQLite. There's almost no friction.
Why Your Mac Is a Development Powerhouse for Databases
Let's clear the air: you don't need a dedicated Linux box or a Windows machine for serious database work. The Mac is a first-class citizen in the development world, especially when it comes to databases. Its real strength comes from that Unix core it shares with the Linux servers running in production.
What this really means is the commands, scripts, and tools you use on your Mac often work exactly the same way on a production server. For example, a pg_dump backup command you perfect on your MacBook will work identically on a production Ubuntu server. This consistency is a huge time-saver, cutting down on the "it works on my machine" problem as you move from local development to deployment.
Simplified Installation and Management
I remember the old days of wrestling with config files and permissions just to get a database running. Thankfully, that's ancient history. With a package manager like Homebrew, setting up a full-fledged PostgreSQL server is as simple as running a single command: brew install postgresql.
This ease of use opens up a lot of doors. Here are some actionable insights:
- Prototype on the fly. Need to test a new API? Run
brew install postgresql,brew services start postgresql, andcreatedb my_new_appto have a full-featured database ready in under two minutes. - Keep projects separate. Easily install and juggle different database versions for different client projects without them interfering with each other. (We'll cover how to do this safely with Docker later.)
- Automate your setup. Create a simple shell script for new projects that installs dependencies, starts the database service, and creates a project-specific user and database. This makes your workflow faster and more reliable.
The Unix-like environment of macOS isn't just a technical detail; it's a practical advantage. It means the terminal commands, file structures, and tools you use for a database on a Mac are often identical to those on production servers, creating a seamless developer experience.
A Unified Workflow with Modern Tools
Of course, a great workflow isn't just about the terminal. Modern desktop GUI tools bring all your database tasks—whether local or remote—under one roof. You can be tinkering with a local SQLite database for a mobile app prototype one minute, then connect to a massive production instance on PlanetScale or Supabase the next, all from the same application.
This consolidation is incredibly powerful. As a practical example, you could use a GUI to quickly duplicate a production table's structure into your local database for testing, saving you from having to manually write the CREATE TABLE statement. If you're looking for the right tool, you can check out our guide on the best database clients for Mac.
These visual tools are perfect for day-to-day tasks. You can quickly inspect a schema, test a query, or import a CSV file without having to write a single line of SQL. It's this combination of raw command-line power and an intuitive GUI that makes the Mac such a fantastic platform for database development today.
Setting Up Your Local Database Environment on macOS
Getting your Mac ready for database development is one of the first, and most important, steps for any project. You might be surprised at just how powerful and straightforward it is to run professional-grade databases right on your machine. We'll walk through getting set up with the essentials: SQLite, PostgreSQL, and MySQL.
The goal here isn't just to install software; it's to build a reliable local environment that mirrors what you'd find in production.
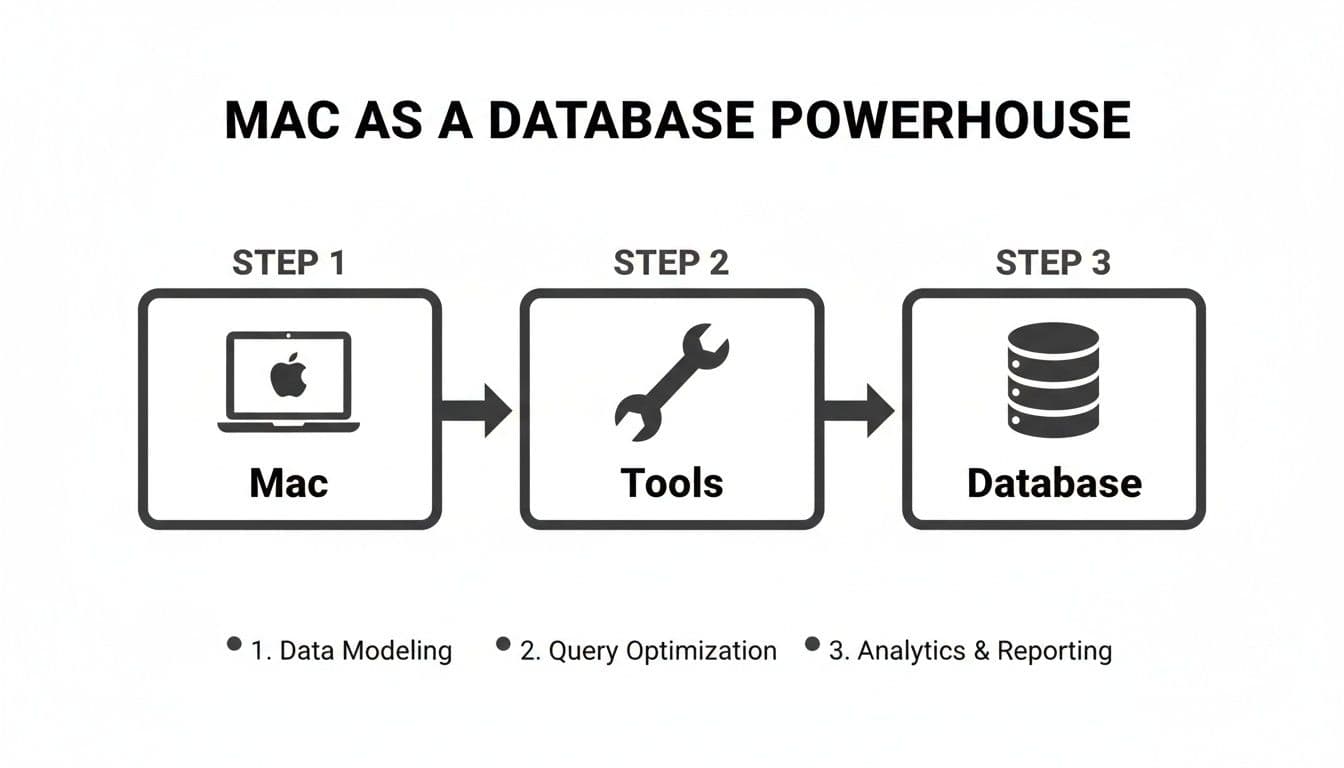
As you can see, your Mac is more than capable of becoming a database powerhouse. With the right tools and a solid workflow, you can handle everything from data modeling to query optimization locally.
Your Built-in Option: SQLite
The absolute fastest way to get a database running is to use the one that's already on your Mac. SQLite comes pre-installed with macOS, so there's nothing to download or set up. You can fire it up directly from the Terminal.
Just pop open your Terminal and run this command. If the file my_project.db doesn't exist, SQLite will create it for you on the fly.
sqlite3 my_project.db
This drops you right into the SQLite command-line, ready for you to create tables and run queries. A practical example: to quickly create a users table, you can type CREATE TABLE users (id INTEGER PRIMARY KEY, email TEXT); and immediately start inserting data. Because it's just a single file, SQLite is fantastic for smaller projects, mobile apps, or just prototyping an idea without the overhead of a full database server.
Installing PostgreSQL with Homebrew
When your project needs more power and features, PostgreSQL is a world-class choice and a favorite among Mac developers. The most painless way to get it installed is with Homebrew, the de facto package manager for macOS.
Assuming you have Homebrew installed, getting PostgreSQL is a one-liner:
brew install postgresql
Once the installation finishes, you'll want to start the PostgreSQL service. This command not only starts the server but also configures it to launch automatically whenever you reboot your Mac, which is incredibly convenient.
brew services start postgresql
Here's a pro tip that will save you headaches down the line: always create a dedicated database and user for each project. It's a bad habit to use the default
postgressuperuser for your applications. Keeping things isolated is cleaner and more secure.
For example, you can create a new database for an e-commerce project with the createdb command that PostgreSQL provides.
createdb ecommerce_dev
This simple step is a cornerstone of a professional local development workflow.
Installing MySQL with Homebrew
MySQL is another giant in the database world, particularly popular for web applications. And just like with Postgres, Homebrew makes installing it on a Mac a complete breeze.
Run the following command to get the latest version:
brew install mysql
Next, start the MySQL service. The command is nearly identical to the one for PostgreSQL and will also set it up to run at login.
brew services start mysql
After starting the service for the first time, you absolutely should run the included security script. This is a critical step. It will guide you through setting a root password, removing anonymous users, and locking down the defaults.
mysql_secure_installation
Follow the prompts, and you'll have a much more secure instance. As an actionable insight, always choose "Yes" when it asks to remove anonymous users and disallow remote root login for your local development setup.
Quick-Reference Commands for Local Database Installation
To make things even easier, here's a quick cheat sheet for installing these databases with Homebrew.
| Database | Installation Command | Initial Setup Command |
|---|---|---|
| PostgreSQL | brew install postgresql | brew services start postgresql |
| MySQL | brew install mysql | brew services start mysql |
| SQLite | Already installed on macOS | sqlite3 your_database_name.db |
With these commands, you can get a powerful local database up and running in just a few minutes.
Now that PostgreSQL and MySQL are installed and running locally, your Mac is equipped with the same database technology powering countless production applications. You're all set to tackle any project, from a simple website to a complex, data-intensive application.
Connecting to Modern Cloud and Serverless Databases
Running a database locally is great for getting started, but real-world projects almost always live on a remote, managed service. Making that leap—connecting your Mac to a cloud database—is a crucial skill you'll use constantly. Let's walk through how to securely connect to some of the most popular providers out there.
We'll be looking at modern platforms like PlanetScale, Neon, Turso, Supabase, and Vercel Postgres. These services are designed to handle the messy parts of database management for you, so connecting your app securely is the main thing you need to get right.
Finding Your Connection Credentials
Your first mission is always to hunt down the connection credentials. Every provider's dashboard looks a little different, but they all give you the same essential pieces of information. Just look for a "Connect," "Database," or "Connection Info" tab in your project dashboard.
On platforms like Vercel or Supabase, this info is usually front and center. For a serverless Postgres provider like Neon, you'll often find a perfectly formatted connection string ready to copy and paste.
No matter where you find them, you'll need these five things:
- Host: The server address where your database is running.
- Port: The specific port number used for the connection.
- Database Name: The name of the database you’re trying to access.
- User: Your username for authentication.
- Password: The secret password tied to that user account.
A quick but important tip: treat your database password with the same care you would a sensitive API key. Never, ever commit it to a Git repository. The standard, and safest, way to handle it is by using environment variables in your applications. For example, in a Node.js app, you'd use process.env.DB_PASSWORD instead of hard-coding the password in your connection code.
The Importance of Secure Connections
When you connect to a remote database, all your data—from credentials to query results—is zipping across the public internet. If that connection isn't encrypted, it's wide open to snooping. That's why using an SSL/TLS encrypted connection is completely non-negotiable for any serious work.
Every reputable cloud database provider not only offers SSL/TLS but often requires it. When you're setting up a new connection, always look for the SSL mode setting. Options like
requireorverify-fulloffer different levels of security, with the latter even verifying the server's identity to prevent man-in-the-middle attacks.
Thankfully, most providers make this easy by building SSL parameters right into the connection string. You might see a PostgreSQL connection URI that ends with ?sslmode=require. This is a direct command to your client telling it to wrap everything in a secure, encrypted tunnel before sending a single byte. If you want to dive deeper into these parameters, check out our guide on how to connect to a PostgreSQL database.
Practical Connection Example: PlanetScale
Let's make this real with an example. I use PlanetScale, a serverless MySQL-compatible platform, all the time. After you've created a database, you just head to its dashboard and hit the "Connect" button.
PlanetScale is smart about this—it gives you pre-configured connection strings for different languages and tools. It also generates unique passwords for different database "branches," which is a fantastic feature for separating your development and production environments.
To connect with a GUI tool from your Mac, you’ll copy the host, username, database name, and the freshly generated password into the new connection form. Here’s the crucial part: you must find and enable the "Use SSL" or "TLS" checkbox. If you forget this step, your connection will fail, because PlanetScale rightly insists on encryption.
Once you get the hang of this process for one provider, you'll find it's almost identical everywhere else. The names and dashboards change, but the core steps of finding credentials and enabling SSL are universal.
Mastering Your Daily Database Workflow
Getting a database up and running on your Mac is one thing, but living with it day-to-day is where the real work begins. True productivity isn't just about running queries; it's about building solid routines for the common tasks you'll face over and over. This is what transforms a simple setup into a professional-grade development environment.
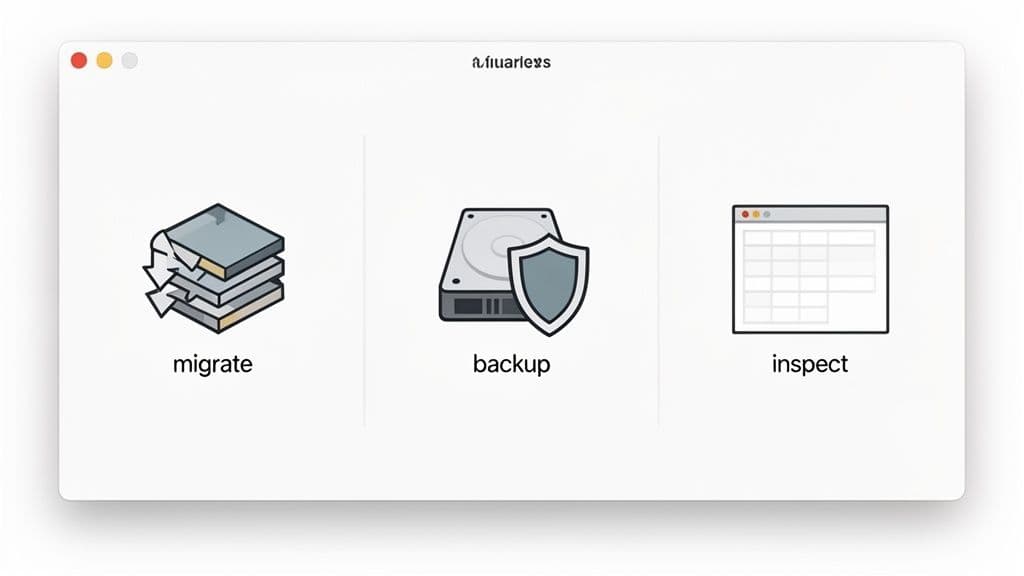
We're going to walk through the three core habits that will save you the most time and prevent the biggest headaches: handling schema migrations, making quick backups, and visually exploring your data. Nailing these will completely change how you build and maintain your apps.
Keeping Your Schema in Sync with Migrations
Here’s a classic scenario: you’re building a new feature for your e-commerce app and need a "gift message" field. You hop into your local PostgreSQL database and add a gift_message column to the orders table. Everything works great. Then you deploy. Suddenly, your app crashes in production because the live database schema doesn't match your code.
This is precisely the problem database migrations solve. Migrations are simply version-controlled scripts that track and apply changes to your schema. Instead of running a manual ALTER TABLE command and hoping you remember to do it on production, you generate a migration file.
Using a tool like Flyway, a new migration file would look something like this:
-- V3__Add_gift_message_to_orders.sql ALTER TABLE orders ADD COLUMN gift_message TEXT;
You run this script on your local machine to update your development database. When it's time to deploy, your CI/CD pipeline runs the exact same migration against the production database. The result? Your schemas are always in sync. This is non-negotiable for team collaboration and creating deployments you can trust.
Performing Quick and Easy Backups
Mistakes happen. We've all been there—you accidentally run a DELETE without a WHERE clause and wipe out a table full of carefully crafted test data. While your local data isn't as critical as production, losing it is a huge pain and a massive time sink. This is where ad-hoc backups become a lifesaver.
For a local PostgreSQL database named ecommerce_dev, you can create a full backup with one simple command:
pg_dump -U your_username -d ecommerce_dev > ecommerce_backup_$(date +%Y-%m-%d).sql
This command dumps the entire database structure and its data into a single .sql file. It's a fast, straightforward way to create a restore point before you do something potentially destructive, like a bulk data import or a complex update script.
Peace of mind is invaluable. I make it a habit to run a quick
pg_dumpbefore performing any large-scale data imports or running complex update scripts. It has saved me from having to manually recreate test data more times than I can count.
Visually Inspecting Your Schema and Data
The command line is powerful, but let's be honest—sometimes you just need to see what's going on. A good desktop GUI like TableOne is indispensable for quickly getting a feel for your database structure without writing a single line of SQL.
Instead of popping into psql and running \d+ orders just to remember a column's data type, you can click on the orders table and see everything visually: the columns, their types, indexes, and even foreign key relationships. This is incredibly useful for exploring complex schemas you're not familiar with or for just quickly browsing tables, filtering records, and making sense of how your data is connected.
It's interesting to note that while we can dive deep into specific database commands, finding reliable statistics on which databases are most popular on macOS is surprisingly hard. Public data tends to focus on hardware sales or OS market share, not the specific tools developers are actually running. You can read more about these data collection challenges and see for yourself how murky the landscape is.
Going Beyond the Command Line: The Case for a GUI
Look, every developer should be comfortable in the command line. It’s powerful and essential. But let’s be honest—for many day-to-day database tasks, it’s just not the fastest tool for the job. When you need to quickly check some data, fix a bad entry, or pull a quick report for a colleague, a good graphical user interface (GUI) is an absolute lifesaver for managing your database on a Mac.
The real magic happens when you move from a pure command-line workflow to a hybrid approach. It's about using the right tool for the moment, and a GUI will make you far more productive.
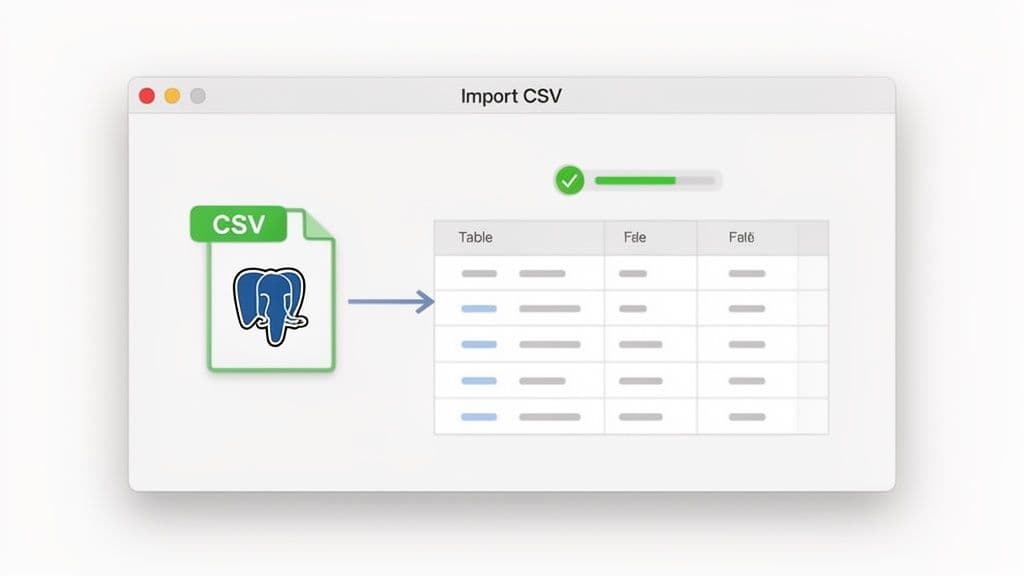
Visual Data Imports and Exports
Imagine your boss drops a products.csv file on you with 10,000 new items to load into your PostgreSQL database. Sure, you could write a script, but that's time spent dealing with delimiters, encoding, and potential errors. With a solid GUI, this task becomes almost trivial.
You just find your products table, select an "Import CSV" option, and map the columns from the file to your table. Most tools will even show you a preview to make sure everything lines up before you commit. It’s a simple, visual process that takes minutes, not hours.
Exporting data is just as easy. Let's say the marketing team needs a list of all users who signed up last month. Instead of writing a query, you can:
- Open the
userstable and visually filter thecreated_atcolumn. - Highlight the rows you need.
- Export them straight to a CSV.
This whole thing takes seconds. You can fulfill these small, ad-hoc requests without getting derailed from your main coding tasks.
A great GUI makes data accessible. It helps developers move faster, but it also lets product managers, analysts, and support staff answer their own questions, which means fewer interruptions for you.
Quick Edits and Painless Debugging
A good GUI is also a fantastic debugging partner. A customer emails support about a problem with their order. Instead of writing a series of SELECT statements to piece the story together, you can just open your orders table in the GUI, filter for that customer's ID, and see their entire order history laid out like a spreadsheet.
If you spot a typo in their shipping address, you can click into the cell and fix it directly. No need to write a careful UPDATE statement. This immediate, hands-on access is perfect for quick fixes and investigations.
While it’s tricky to find hard numbers on GUI adoption for macOS developers—most data collection reports focus on OS market share, not specific tools—the trend across the industry is clear: visual tools are a key part of the modern developer's toolkit.
These workflows aren’t just for developers, either. By getting comfortable with a GUI, you make it easier to pull data, create quick reports, and inspect records, making the database less intimidating for everyone on the team. We dive into more hands-on examples in our guide to using an SQLite GUI for Mac.
Common Questions About Mac Database Management
Even with a solid setup, a few key questions always come up when you're managing a database on a Mac. Let's tackle some of the most frequent challenges I see developers run into and get you some practical answers for real-world work.
What Is the Best Database to Start With on a Mac?
If you're just starting a new project or learning the ropes, my advice is always the same: start with SQLite. It’s the path of least resistance.
SQLite comes pre-installed on every Mac, so there’s zero server setup. Your entire database lives in a single file on your computer, which makes it incredibly simple to manage for prototypes, mobile apps, or small-scale tools.
But what if your project needs more muscle? When you're building a proper web application that demands things like strict data typing and handling many simultaneous connections, PostgreSQL is a fantastic choice. It's known for being incredibly robust and standards-compliant, making it a favorite among professional developers. Of course, MySQL is another excellent and widely-used option, especially in the web development world.
How Can I Run Multiple Database Versions Simultaneously?
This is a classic headache. Maybe one project needs PostgreSQL 14 while another requires version 16. The cleanest, most reliable way to handle this is by using Docker.
With Docker, you can spin up different database versions in their own isolated containers. Each one has its own libraries and can be mapped to a different port on your machine, completely avoiding the version conflicts that plague other methods. For a practical example, you could run docker run --name pg14 -e POSTGRES_PASSWORD=mysecretpassword -p 5433:5432 -d postgres:14 to start a PostgreSQL 14 instance on port 5433, while your main Homebrew-installed version runs on the default 5432.
While it's technically possible to juggle different versions using a tool like Homebrew, I'd strongly advise against it. It's a complicated and error-prone process. A much saner approach is to stick with one primary version of a database locally and fire up a Docker container whenever a project has a specific version requirement.
Using a dedicated database migration tool is the only reliable way to keep your schemas synchronized across local, staging, and production environments. This practice is a cornerstone of professional team-based development and ensures predictable, repeatable deployments.
What Is the Best Way to Keep My Database Schemas in Sync?
The only professional answer here is to use a dedicated database migration tool. This is non-negotiable for any serious project.
These tools let you define all your schema changes—like adding a table or a new column—in simple script files that you can check into version control (like Git). You might use a tool like Flyway or Alembic to write a script that adds a last_login_at column. You run that script on your local database, and you're good to go.
When it's time to deploy, you run that exact same script on your production database. This guarantees both environments are perfectly in sync and completely eliminates the dreaded "it worked on my machine" problem. For an actionable insight, integrate the migration command (e.g., flyway migrate) as a step in your deployment script or CI/CD pipeline to automate this process entirely.
TableOne makes all of these workflows simpler. It gives you a clean, intuitive interface to connect to any local or remote database, visually inspect your schema, and manage data without the usual friction. Try the 7-day free trial and see how much faster you can work. Get started with TableOne.