How to Create a User in MariaDB: The Definitive Guide
Learn how to create a user in MariaDB with our definitive guide. Master CREATE USER, grant privileges, manage roles, and troubleshoot common errors.

Ready to create your first user in MariaDB? I'll show you the fastest way to get a new, secure user up and running in just a few minutes. We'll cut straight to the chase, focusing on the essential, actionable commands you need to create an account, assign permissions, and understand the critical difference between local and remote access.
This isn't just a theoretical exercise; it's a fundamental skill for any developer or administrator working with MariaDB. Secure user management is a universal need, especially given MariaDB's widespread use across more than 18,853 companies. From small businesses (36%) to large enterprises (22%), proper user setup is non-negotiable. It's particularly dominant in IT services, holding a 26% market share, with the United States alone making up 34% of its user base. You can explore more data on MariaDB's global adoption if you're curious.
Creating a MariaDB user is a two-step dance: first, you use CREATE USER to bring the account into existence with a password. Then, you use GRANT to give it permissions. This separation is a core security principle, ensuring no user gets permissions by accident.
Creating a Local User
Let's start with a practical, everyday scenario: creating a user for a web application that runs on the same server as the database. This local-only access is a critical security measure.
First, connect to MariaDB with a privileged account, like root. Once you're in, run the CREATE USER command.
Actionable Example:
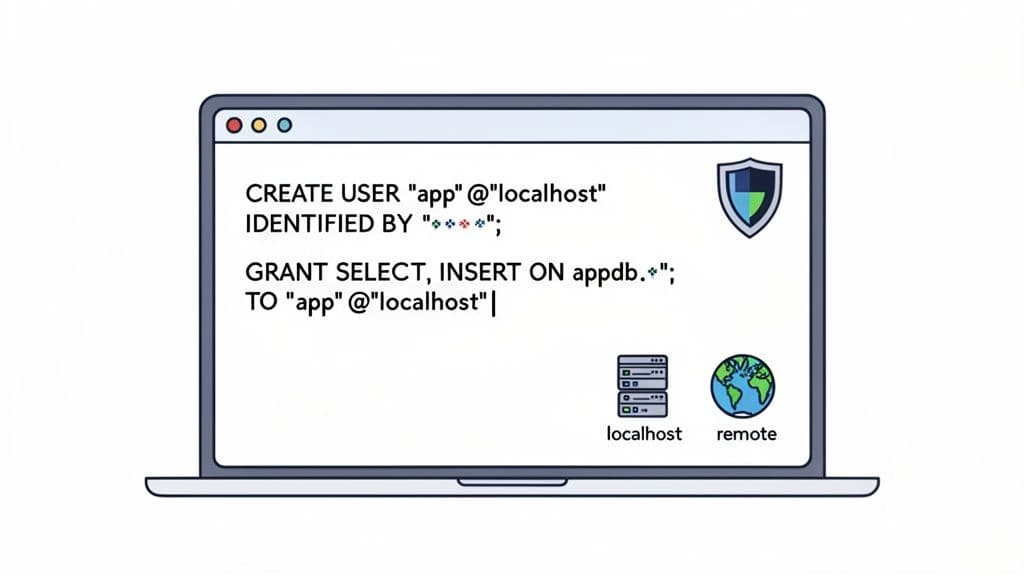
CREATE USER 'app_user'@'localhost' IDENTIFIED BY 'a_very_strong_password';
This single line tells MariaDB to create a user named app_user that can only connect from 'localhost'. The IDENTIFIED BY part sets the password, so be sure to use something strong and unique.
Granting Essential Permissions
Right now, your new user exists but can't do anything. By default, new users have zero privileges. This is where the GRANT statement comes in.
Let's give our app_user full control, but only over a specific database named my_app_db.
Actionable Example:
GRANT ALL PRIVILEGES ON my_app_db.* TO 'app_user'@'localhost';
Key Takeaway: Pay close attention to the
my_app_db.*syntax. It's shorthand for "all tables within themy_app_dbdatabase." This is a crucial security practice, as it stops the user from poking around in other databases on the server and adheres to the principle of least privilege.
As a final step, it's a good practice to reload the grant tables. This makes sure your new permissions are applied immediately for any new connections.
Actionable Example:
FLUSH PRIVILEGES;
Here is a quick reference table summarizing these core commands.
| Core MariaDB User Creation Commands |
| :--- | :--- | :--- |
| Command | Purpose | Example |
| CREATE USER | Defines a new user account and sets its password and host. | CREATE USER 'user'@'host' IDENTIFIED BY 'password'; |
| GRANT | Assigns specific permissions to a user for a database or table. | GRANT SELECT, INSERT ON db.* TO 'user'@'host'; |
| FLUSH PRIVILEGES | Reloads the internal privilege tables to apply changes immediately. | FLUSH PRIVILEGES; |
With just these three commands, you've created a secure, properly permissioned user. This new account is now ready to be used by your application or a GUI tool like TableOne for connecting to your database, editing data, and running queries safely.
Taking CREATE USER to the Next Level
The basic CREATE USER command is functional, but the real magic happens when you start using its optional clauses. This is where you can bake in security policies right from the start, moving beyond just a username and password to create truly robust user accounts in MariaDB.
By specifying a hostname, for instance, you're immediately controlling where a user can connect from. Think of it as your first line of defense.
Locking Down User Connections by Host
Defining where a user can log in from is a simple yet powerful security tactic. It means that even if a user's credentials are stolen, they're useless unless the attacker is also coming from an approved location. This adds a critical layer of security to your database.
You'll find yourself using three main host specifiers over and over:
localhost: This is your bread and butter for any application running on the same server as MariaDB. It restricts the user to connecting only through local channels, making it perfect for a web server or a backend service that lives on the same box as the database.- A Specific IP Address: Got a developer who needs remote access from their workstation? Or a dedicated application server on another machine? Use its static IP address. This grants access to that specific machine and nothing else.
- The Wildcard (
%): The%wildcard lets a user connect from anywhere. You need to be extremely careful with this one, as it throws the door wide open. It’s usually reserved for special admin accounts where the source IP is unpredictable or for public services where another layer, like a firewall, is handling access control.
Let's look at how these work in the real world.
Actionable Example: Local Application User
CREATE USER 'webapp_user'@'localhost' IDENTIFIED BY 'local_secure_p@ss';
Actionable Example: Remote Developer Access
CREATE USER 'dev_jane'@'198.51.100.10' IDENTIFIED BY 'remote_dev_p@ss';
Actionable Example: Global Access (Use with Caution!)
CREATE USER 'api_reader'@'%' IDENTIFIED BY 'global_access_p@ss';
A Quick Tip from Experience: MariaDB is smart about how it prioritizes these rules. It always chooses the most specific match. So, if a user could potentially match both a specific IP and a wildcard (
%), the IP rule will win.
Adding Advanced Security Policies at Creation
Beyond just controlling where a user connects from, you can enforce security policies right in the CREATE USER statement itself. This builds the rules directly into the account, saving you from having to apply them manually later on.
Check out this command, which creates a much more secure user from the get-go:
Actionable Example: Secure Auditor Account
CREATE USER 'auditor'@'10.0.1.5'
IDENTIFIED BY 'P@ssw0rdExpire$Now'
PASSWORD EXPIRE INTERVAL 90 DAY
ACCOUNT LOCK
REQUIRE SSL;
Here’s a breakdown of what’s happening in that single command:
PASSWORD EXPIRE INTERVAL 90 DAY: This is a classic security policy. It forces the user to change their password every 90 days, limiting the lifespan of a potentially compromised credential.ACCOUNT LOCK: This is fantastic for pre-provisioning. It creates the user account but keeps it disabled. When the user is ready to start, you can simply enable their access withALTER USER 'auditor'@'10.0.1.5' ACCOUNT UNLOCK;.REQUIRE SSL: This one is non-negotiable for any sensitive connection. It forces the user to connect over an encrypted SSL/TLS channel. If they try to connect without it, the server will flat-out reject the attempt, protecting their credentials and any data in transit.
By combining these options, you're not just creating a user; you're building an account that aligns with modern security standards from its very first second. This proactive approach is always better than trying to bolt on security after the fact.
Granting Privileges and Defining User Roles
Creating a user account is just the first step. Without any permissions, a new user is like having a key to a house but not being allowed to open any doors. They can connect, but they can't see or do anything. This is where the GRANT statement comes into play. Mastering it is what separates a basic setup from a secure, well-managed database environment.
The foundational concept here is the principle of least privilege. It's a simple but powerful idea: a user should only have the absolute minimum permissions needed to do their job, and not a single privilege more. Giving ALL PRIVILEGES on *.* (every database, every table) to a regular user is asking for trouble. It's the database equivalent of leaving the front door wide open.
Instead, you need to think about scope. Where does this user really need access?
- Global (
*.*): Grants permissions across every database on the server. Actionable Insight: Only use this for your truerootor administrative accounts. - Database (
database_name.*): Perfect for application users. Actionable Insight: This is the most common and recommended scope for a service account. - Table (
database_name.table_name): Grants access to a single table. Actionable Insight: Ideal for a script that only needs to update a specific log or status table. - Column: Grants permissions on specific columns. Actionable Insight: Use this for highly sensitive data, like giving a user
SELECTaccess to anemployeestable but not to thesalarycolumn.
Before you even get to privileges, you have to decide where the user will be connecting from. This choice determines the 'host' part of the user identifier and is a critical first step.
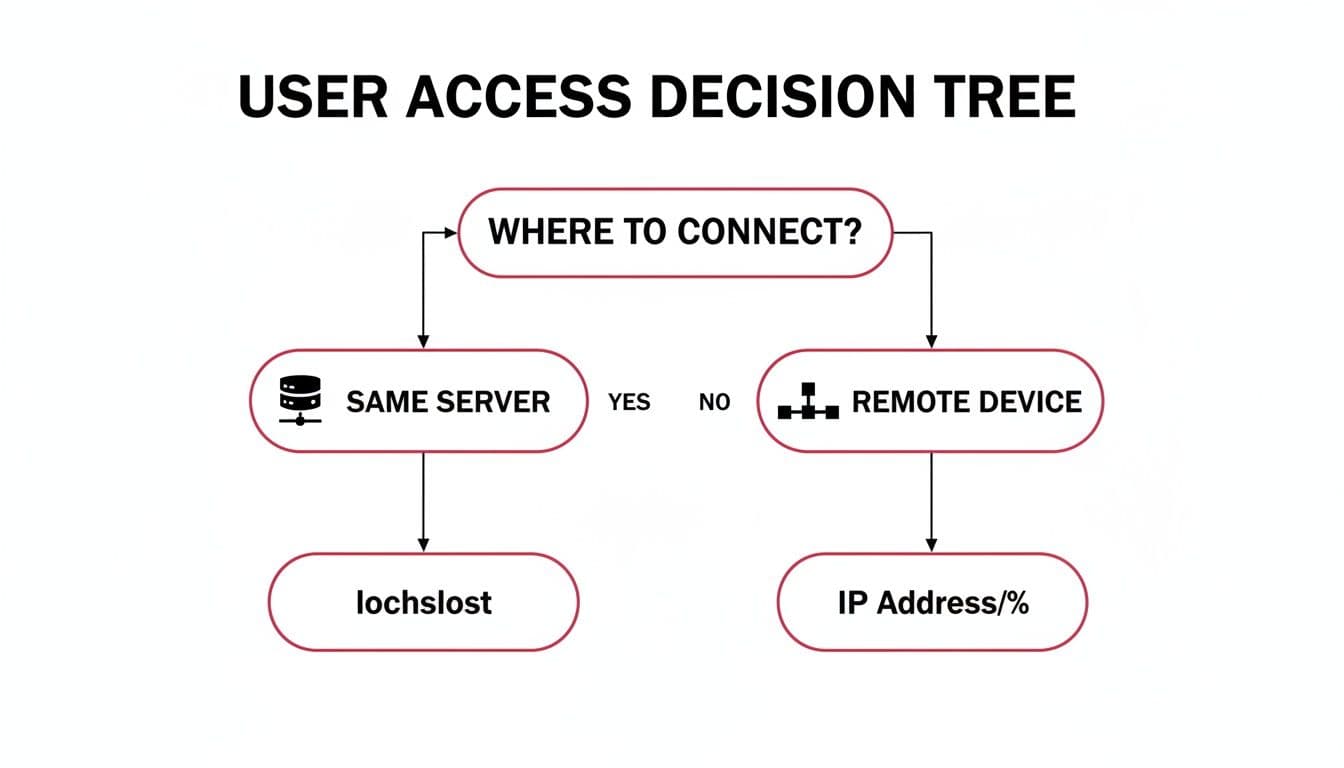
As you can see, you need to know if the connection will be local ('localhost') or from a specific remote machine ('ip_address') before assigning any permissions.
Common User Roles and Their Privileges
In the real world, you'll encounter a few common archetypes for database users. Thinking in terms of these "roles" makes it much easier to assign the right set of privileges from the start.
| User Role | Typical Privileges | Use Case Scenario | Actionable Example |
|---|---|---|---|
| Read-Only Analyst | SELECT | A business analyst connecting a BI tool (like Tableau or Power BI) to run reports on production data. | GRANT SELECT ON analytics_db.* TO 'bi_user'@'10.1.2.3'; |
| Application Backend | SELECT, INSERT, UPDATE, DELETE | The user account for a web application's backend service that needs to perform CRUD operations on its own database. | GRANT SELECT, INSERT, UPDATE, DELETE ON app_db.* TO 'webapp'@'localhost'; |
| Developer | ALL PRIVILEGES (on dev database) | A developer working in a staging environment who needs to create tables, alter schemas, and manage data. | GRANT ALL PRIVILEGES ON dev_db.* TO 'dev_sara'@'192.168.1.100'; |
| Backup Operator | SELECT, LOCK TABLES, SHOW VIEW | A dedicated user for an automated script that performs daily database backups. | GRANT SELECT, LOCK TABLES, SHOW VIEW ON *.* TO 'backup_bot'@'localhost'; |
This table-based approach helps enforce the principle of least privilege by clearly defining what each type of user should—and shouldn't—be able to do.
Scaling Permissions with MariaDB Roles
Managing permissions for individual users works fine when you only have a few. But what happens when your team grows? Running the same GRANT statements over and over is tedious and, worse, prone to error.
This is exactly the problem MariaDB Roles were designed to solve. A role is simply a named collection of privileges.
Key Takeaway: Think of roles as a way to separate the permissions from the people. You define the "Developer" or "Analyst" rule set one time. From then on, you just assign people to the role, and they automatically inherit the correct permissions. It's a massive time-saver that dramatically reduces mistakes.
Here’s a practical, step-by-step example for creating and using a role.
Step 1: Create the Role
CREATE ROLE app_developer;
Step 2: Grant Permissions to the Role
GRANT SELECT, INSERT, UPDATE, DELETE ON my_app_db.* TO app_developer;
Step 3: Create Users and Assign the Role to Them
CREATE USER 'dev_sara'@'localhost' IDENTIFIED BY 'sara_p@ss';
CREATE USER 'dev_mike'@'localhost' IDENTIFIED BY 'mike_p@ss';

GRANT app_developer TO 'dev_sara'@'localhost', 'dev_mike'@'localhost';
Now, both Sara and Mike have the exact same access. If you later decide they also need to create tables, you only have to run one command: GRANT CREATE ON my_app_db.* TO app_developer;. Both users will instantly inherit the new privilege.
Getting roles and privileges right is a cornerstone of database security. For a deeper dive into this area, you can explore some general database security best practices in our detailed guide.
Practical User Management and Verification
Once you’ve created a user in MariaDB, your job isn't quite done. Real database administration is an ongoing process. You need to periodically check on users, tweak their permissions, and clean up old accounts to keep things running securely and efficiently.
Think of it as basic digital hygiene. If you neglect it, you end up with a mess of forgotten accounts and overly generous permissions—a classic security nightmare waiting to happen.
Auditing Existing Users and Permissions
Before you can manage anything, you need to know what—and who—you're dealing with. The first order of business is getting a complete list of every user account on your server.
Actionable Example: List All Users This command will give you a quick inventory of every user and the host they can connect from:
SELECT user, host FROM mysql.user;
Running this for the first time can be an eye-opener. You’ll almost certainly find default system users or old accounts that were never cleaned up. Making this query a regular habit helps you spot accounts that have no business being there.
Of course, just knowing a user exists doesn't tell you the whole story. You need to know what they can actually do. For that, the SHOW GRANTS command is your best friend.
Actionable Example: Check a Specific User's Permissions
Let's check on our app_user:
SHOW GRANTS FOR 'app_user'@'localhost';
This is absolutely essential for security audits. It tells you, in no uncertain terms, what that user is capable of. If you run this and see GRANT ALL PRIVILEGES ON *.* ... for a simple application user, you've just found a major security hole that needs plugging immediately.
Modifying and Cleaning Up User Accounts
Things change. Passwords need to be updated, security policies get stricter, or an employee moves on. The ALTER USER, REVOKE, and DROP USER commands are your go-to tools for handling these real-world scenarios.
Here are a few actionable examples for common situations:
Actionable Example: Forcing a Password Change
When a password needs to be updated right away, ALTER USER gets it done.
ALTER USER 'dev_jane'@'198.51.100.10' IDENTIFIED BY 'new_s3cure_p@ssw0rd';
Actionable Example: Requiring an Encrypted Connection If you created a user without requiring SSL/TLS, you can easily add this requirement after the fact.
ALTER USER 'api_reader'@'%' REQUIRE SSL;
A Pro Tip: Don't think of
ALTER USERas just a password-changing tool. It's your primary command for tweaking a user's authentication and security settings after they've been created. This is perfect for tightening security on the fly without having to drop and recreate the entire user.
Taking away permissions is just as vital as granting them. REVOKE lets you perform surgical strikes, removing specific privileges.
Actionable Example: Removing a Dangerous Permission If a developer no longer needs the ability to delete data from the app's database:
REVOKE DELETE ON my_app_db.* FROM 'dev_sara'@'localhost';
Finally, when an account is truly no longer needed, get rid of it.
Actionable Example: Deleting an Old User Account
DROP USER 'former_employee'@'%';
By regularly auditing, modifying, and tidying up user accounts, you ensure your MariaDB instance stays secure. While these commands are powerful, these workflows are often easier to manage visually. You can learn more about the best database clients that can help streamline these tasks.
Troubleshooting Common User Creation Issues
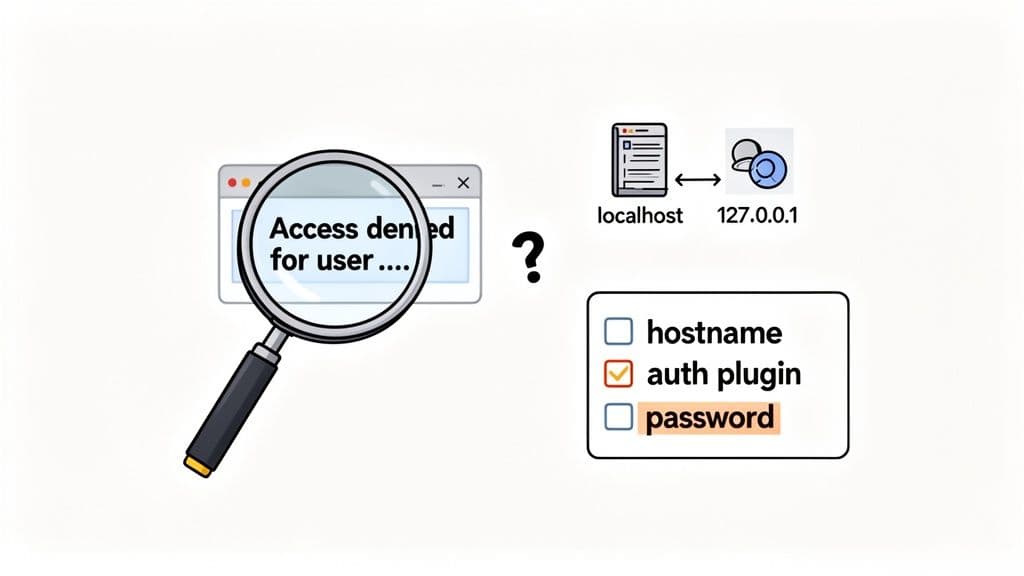
Even with carefully crafted commands, you're bound to hit a snag eventually. The error you’ll see most often is the infamous Access denied for user.... While it sounds straightforward, this message can pop up for several reasons, and it's frequently tied to how MariaDB identifies the machine you're connecting from.
Diagnosing Host Mismatch Errors
A classic mistake is a mismatch between the host defined in your CREATE USER statement and the host you're actually connecting from. For instance, you might think 'localhost' and '127.0.0.1' are the same thing. To us, they are. To MariaDB, they are not.
MariaDB treats them as two completely separate hosts. If your application connects using the IP address 127.0.0.1, but the database user was only set up for localhost, MariaDB will deny the connection.
- The Cause: Your application is using a TCP/IP connection (via
127.0.0.1), but the user account is configured for a Unix socket connection (localhost). - The Actionable Fix: The simplest solution is to create the user for both host types. First, check which host is failing using
SHOW GRANTS FOR CURRENT_USER;from the failing client. Then, create the user for that specific host.
To cover all your bases, you can just create and grant for both hosts:
CREATE USER 'app_user'@'localhost' IDENTIFIED BY 's3cure_p@ss';
CREATE USER 'app_user'@'127.0.0.1' IDENTIFIED BY 's3cure_p@ss';

GRANT ALL PRIVILEGES ON my_app_db.* TO 'app_user'@'localhost';
GRANT ALL PRIVILEGES ON my_app_db.* TO 'app_user'@'127.0.0.1';
Solving Authentication and Syntax Problems
Beyond host mix-ups, other issues usually stem from authentication plugins or simple typos. If you get a retcode: 1045 error, that's almost certainly an authentication failure.
These failures can come from a few different places:
- Incorrect Password: It’s the obvious one, but always worth double-checking. A simple typo can cost you hours.
- Authentication Plugin Mismatch: The client tool might be trying to authenticate with a method the server-side user isn't set up for.
- Password Validation Failure: Some servers have plugins that enforce strong passwords. If the password you set is too simple, the
CREATE USERcommand itself might fail silently, or the user won't be able to log in.
Key Takeaway: When you're stuck, your first move should be to check the MariaDB error log. It often provides a much more detailed explanation than what your client application shows, pointing you right to the source of the trouble, like a password policy rejection.
Another common pitfall is a subtle syntax error in a GRANT statement. Forgetting the TO keyword or getting the user and database names backward can throw some confusing errors. Always double-check your GRANT commands to make sure they follow the GRANT [privileges] ON [database.table] TO [user@host] structure. Getting the syntax right is fundamental when you create a user in MariaDB and give it the right permissions.
Common Questions About Managing MariaDB Users
When you're deep in the weeds of database administration, a few common questions always seem to pop up around user management. Let's tackle some of the most frequent ones I hear from developers and new DBAs.
What’s the Real Difference Between CREATE USER and GRANT?
You might see older tutorials or legacy scripts creating users directly with the GRANT command. While MariaDB still supports this for backward compatibility with old MySQL habits, it's not the modern way to do things.
Actionable Insight: Always use CREATE USER first. This command is specifically designed for setting user-level properties like password expiration and SSL requirements. Using GRANT to create users is deprecated and hides what's actually happening. Explicitly separating the two makes your SQL scripts cleaner, more readable, and easier to maintain.
First, create the user with its security policies:
CREATE USER 'user'@'host' IDENTIFIED BY 'password' REQUIRE SSL;
Then, grant permissions:
GRANT SELECT ON app_db.* TO 'user'@'host';
How Can I Get a Full List of All MariaDB Users?
For a definitive list, you need to query the user table within the mysql database itself. It’s the source of truth for user accounts.
Actionable Example:
SELECT user, host FROM mysql.user;
This is one of the first commands I run when I inherit a new database system. It's an essential command for any security audit or routine cleanup. You'd be surprised what you find!
A Quick Word on
FLUSH PRIVILEGES: A common point of confusion is when to useFLUSH PRIVILEGES. The good news is, you rarely need it. When you use standard commands likeGRANT,CREATE USER, orREVOKE, MariaDB is smart enough to reload its privilege tables in memory automatically. You only need to manually flush them if you've directly modified the grant tables withINSERTorUPDATE—a practice I strongly advise against.
Is it Possible to Create a User Without a Password?
Technically, yes, you can. Just leave off the IDENTIFIED BY part of the command: CREATE USER 'user'@'host';.
However, this is a major security risk and you should almost never do it. The only real-world scenario where this is somewhat acceptable is for local connections using an authentication plugin like unix_socket, where the operating system's user account handles the authentication. For any connection coming over a network, always, always set a strong password.
Choosing the right database involves looking at details like these. If you're exploring your options, our detailed comparison of MySQL vs PostgreSQL dives into how their core philosophies differ on security and features.
Wrangling users, permissions, and connections can get messy. A good client makes all the difference. TableOne gives you a straightforward, predictable UI for all those daily database tasks—from firing off a quick query to comparing schemas. Grab the free trial and feel the difference in your workflow.